

It has been a hot minute since I did one of my Poor Badger blogs, I have really missed it. We've had a great year so far this 2012, I just have been kept bust with a 4, 3, and 1 year old. Even as I type this I am bathing one kid for church and creeping silently to avoid waking the other two. But I truly miss this and I miss the people I've met doing this.
Now for some old business:

I am blessed, humbled, and dumbfounded that over 11,000 people read my blog last year. People from Asia, Africa, South America, Europe, Australia,and North America showed up to my blog. Still haven't cracked that Antarctic market though. ;)
Thank you for that, I do hope to have more projects for you.
Onto the project!
This came out of a scary and frustrating situation. My husband is a janitor for a local school system and carries a set of keys for the doors, closets, etc. If he loses those keys it is MAJOR TROUBLE! Guess what he did? Hid them over his vacation so he wouldn't lose them and FORGOT where he hid them! Thank God he found them and so out of a crisis a craft emerged!

You'll need:
*a board ($2.99 @Hobby Lobby)
*scrapbook paper in any style (.59 @ Hobby Lobby)
*some hardware to hang the keys (50% sale @ Hobby Lobby.... $1.50 a PIECE!!!)
*some paint
*mod podge
*some screws

First I painted the edge, any color you want. I Liked the dark brown with the woodsy style.

After you paint it, figure out where on the board you want your hardware. Place and mark where the screw needs to go.
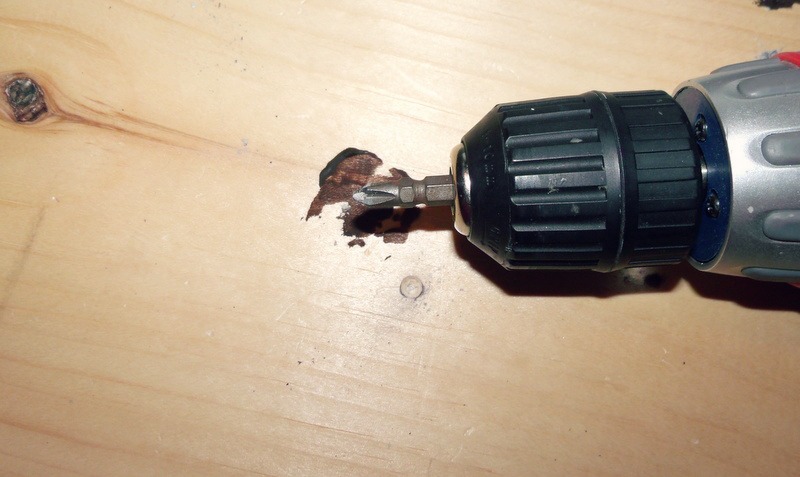
Pre-drill your pilot holes. This makes things easier afterwards.

Apply scrapbook paper to board with a thin layer of mod podge. Smooth out paper and work with any air bubble.

Use your tiny scissors to trim the extra away.

Apply 1 or 2 coats of mod podge to the entire project, depending on how you want it. Then screw your screws into the board. Your paper won't tear because you drilled the pilot holes.

Because we are poor folk and do things as easy peezy as possible, I used my diet Dr. Pepper lid to make a hanging tab on the back.

There you go! If Hobby Lobby doesn't have the
hardware on sale, print off their 40% coupon from
their site. This would also be cute if you used cute
drawer knobs, old faucets found at a yard sale,
or something from nature.

Thanks for reading and I promise not to be
such a stranger anymore!
replica watches, nike outlet, sac longchamp, longchamp, longchamp pas cher, nike free, louboutin outlet, longchamp outlet, louis vuitton, ugg boots, jordan shoes, tory burch outlet, nike air max, ray ban sunglasses, tiffany and co, uggs on sale, ralph lauren pas cher, prada outlet, polo ralph lauren outlet, prada handbags, oakley sunglasses, nike roshe run, nike air max, cheap oakley sunglasses, ugg boots, louis vuitton outlet, michael kors, ray ban sunglasses, louboutin pas cher, kate spade outlet, tiffany jewelry, air jordan pas cher, air max, burberry, louboutin, polo ralph lauren outlet, nike free, oakley sunglasses, ray ban sunglasses, oakley sunglasses, longchamp outlet, louboutin shoes, louis vuitton, gucci outlet, louis vuitton outlet, replica watches, louis vuitton, oakley sunglasses, chanel handbags, christian louboutin outlet
ReplyDeletemontre pas cher, thomas sabo, moncler, moncler, moncler, karen millen, bottes ugg, toms shoes, pandora jewelry, links of london, ugg boots uk, canada goose outlet, pandora jewelry, canada goose outlet, supra shoes, hollister, moncler, pandora charms, ugg pas cher, louis vuitton, canada goose, moncler outlet, sac louis vuitton pas cher, moncler, moncler, wedding dresses, canada goose, swarovski crystal, moncler, louis vuitton, ugg,uggs,uggs canada, ugg,ugg australia,ugg italia, replica watches, canada goose, coach outlet, pandora charms, canada goose, doudoune canada goose, marc jacobs, louis vuitton, louis vuitton, canada goose uk, juicy couture outlet, juicy couture outlet, swarovski
ReplyDelete