Monday, October 15, 2012

Upcycled Kids Table/Confessions of a Board Game Addicted Family


Are your kids as destructive as a swarm of locusts like mine? 

We have a 5, 3, and 1 year old who can produce wear and tear on any household object like a pro.

This little card table is so handy at our house for board games, if you know us you will know our LOVE of board games!


So with little money, here is a quick DIY. These tables are main stars at Goodwill and yard sales, so if you see one for 5 bucks it will be well worth the investment. 


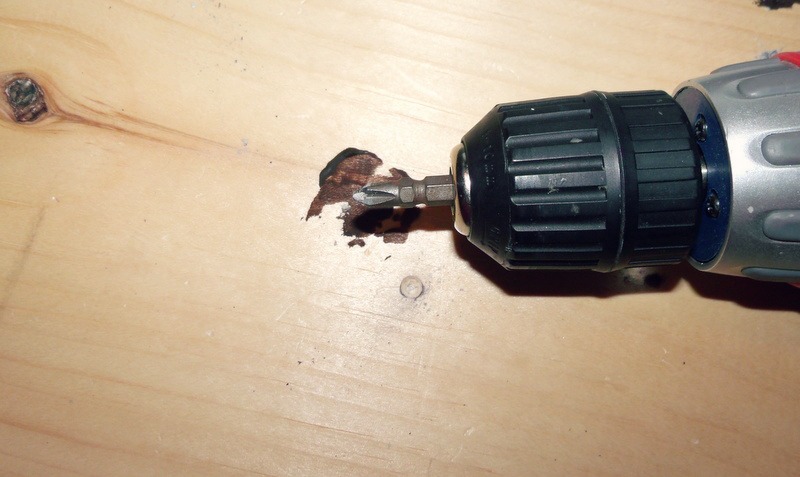
I wanted to include this picture because my simple DIY started out as an epic FAIL. I had the great idea to do this in silver.... it did not look cute at all.


What I used was two cans of spray paint, apply an even coat. Some decorative duct tape and some scraps of card stock. Only because I ran out of duct tape, but I'll claim that was my design intent.  ;)

Apply your design of paper or tape, a few layers of mod podge, and a clear spray sealant and.....

Hungry Hungry Hippos
 BOARD GAME TIME!

Doggie Doo


Doggie Doo


 This game is fun and gross; two good board game qualities. 

I told you we like our board games.... 

 
 Thanks for reading and I promise to not be a stranger for so long this time. I am still humbled and impressed by all the people who read this. 

Poor Badger


Tuesday, July 31, 2012

Oh my JEEZ!

   
   If you apart of the Ikea rewards program or are on the mailing list, I am sure you got the same AWESOME surprise in the mail that I got. Complete ERMAGERD moment! Going to wait until the little ones go to bed and dissect this book like I'm Nick Cage and there is a map in it you can only see with a black light. 


   Enjoy your catalog fellow Ikea fans and DIYers!

Saturday, July 14, 2012

Something I saw on pinterest; the series.


I've been planning on doing this for a while now, a series of reviews of the awesome projects that I've pinned and tried on pinterest.  I want to start by saying two things... 

1. If you are not on pinterest, go NOW! (well AFTER you read this of course). Pinterest is the greatest thing since Martha Stewart for people who craft, bake, cook, or ANY Martha related interest.

2. My goal in this series is to NOT be mean to another crafter. People who create are my people and in the words of one of the funniest females EVER, Whoopi Goldberg; 'if you can't be witty, don't be sh@#%^'. Pinterest has so many awesome ideas, I just wanted to share my thoughts and let you know if it is worth your time and money.


This project has been all over pinterest and blogged by many people, so I have no clue who to source as the original. The cost is very cheap. Just 2 yards of fabric and a cheap $7 roller blind (with about $4 worth of hardware). 


Very simple instructions; just hot glue your fabric to the roller blind, like wrapping a present. 


The amount of time was good too. Me and my husband did this during one 30 minute episode of Parks and Rec. God bless Ron Swanson!


So out of a 5 'pin' rating. I give this 2 and a 1/2 pins. Very cheap and easy to do, not much skill required. The only issue we had is that the blind does not roll up so well. This window had been a HUGE pain in our neck, funneling sunlight into the home like a laser beam. We are very happy with the outcome but we do wish it rolled up easier. This might be an error on our part or a flaw in the blind itself...either way it is a great idea to add something unique and one of a kind for little money. 


Thanks for reading!


Sunday, July 8, 2012

DIY: Key Rack


                It has been a hot minute since I did one of my Poor Badger blogs, I have really missed it. We've had a great year so far this 2012, I just have been kept bust with a 4, 3, and 1 year old. Even as I type this I am bathing one kid for church and creeping silently to avoid waking the other two. But I truly miss this and I miss the people I've met doing this.


           Now for some old business:


           I am blessed, humbled, and dumbfounded that over 11,000 people read my blog last year. People from Asia, Africa, South America, Europe, Australia,and North America showed up to my blog. Still haven't cracked that Antarctic market though. ;)


          Thank you for that, I do hope to have more projects for you.


          Onto the project!


          This came out of a scary and frustrating situation. My husband is a janitor for a local school system and carries a set of keys for the doors, closets, etc. If he loses those keys it is MAJOR TROUBLE! Guess what he did? Hid them over his vacation so he wouldn't lose them and FORGOT where he hid them! Thank God he found them and so out of a crisis a craft emerged!


You'll need:
*a board ($2.99 @Hobby Lobby)
*scrapbook paper in any style (.59 @ Hobby Lobby)
*some hardware to hang the keys (50% sale @ Hobby Lobby.... $1.50 a PIECE!!!)
*some paint
*mod podge
*some screws


          First I painted the edge, any color you want. I Liked the dark brown with the woodsy style.


             After you paint it, figure out where on the board you want your hardware. Place and mark where the screw needs to go.


               Pre-drill your pilot holes. This makes things easier afterwards.


        Apply scrapbook paper to board with a thin layer of mod podge. Smooth out paper and work with any air bubble.


            Use your tiny scissors to trim the extra away.


             Apply 1 or 2 coats of mod podge to the entire project, depending on how you want it. Then screw your screws into the board. Your paper won't tear because you drilled the pilot holes.


              Because we are poor folk and do things as easy peezy as possible, I used my diet Dr. Pepper lid to make a hanging tab on the back. 


There you go! If Hobby Lobby doesn't have the 
hardware on sale, print off their 40% coupon from
their site. This would also be cute if you used cute
drawer knobs, old faucets found at a yard sale,
or something from nature. 


Thanks for reading and I promise not to be 
such a stranger anymore!

Tuesday, December 20, 2011

No mantel? No problem! The stocking tutorial on making and hanging those socks for Santa.


Stockings hung by the chimney with care? Not in this house of crafty loons. 

Christmas is slowly approaching and to me this is the saddest week. Soon all the fun crafts, food, and that joyful magic will evaporate and we will have a long wait until the next Santa season. 


Lets make our stockings. God bless black Friday at Jo Annes Fabric! They had comfy fleece for $1.49 a yard. We went to Wal-Mart, Toys -R- Us, and Target that morning and nothing was as brutal as all the vicious ladies in the fleece section going bonkers. We picked half a yard of fleece for each Scaff. It was fun picking the prints according to personality.  You'll also need some white felt for the cuff.


I free handed a basic stocking on paper, but if you want yours super perfect there are loads of free patterns online. Trace, cut, and sew. 


I just drew a rectangle for the cuff and hot glued it to the stocking after I turned it right side out. 


Don't forget your little tab for hanging! If you are really loading your stockings you might want to sew in place of hot gluing. I sewed the stocking but I really LOVE my sewing machine and I get kinda hissy about sewing thick materials, crafty and crazy persons problem. 


Now as you saw above we hung our stockings in a different way, so like the perfect dress this outfit needed some accessories. These were also black Friday finds, with coupons!


Even though I would have loved to take 3 hours and paint these perfectly, kids love to help and be included. Since this would be something meaningful to us I wanted it to be made by MY greatest creations. 


I just put some paint on a paper plate and let those creative fingers do their thing. Nothing makes a kid happier than showing off what they made all by their selves.


Even the baby got to paint a bulb in her choice of color; orange. What a cute Christmas Elf.


So as I said before; no mantel, no problem! We went adventuring and found this cool branch. A few nails and ribbon to secure it to the wall and some push pins to hang the stockings on, and we ended up with a piece we are all proud of. 


It is much easier to buy these things, but it is defiantly not cheaper or more special. My kids get such a kick out of explaining whose stocking is which to our visitors, and they take tremendous pride in knowing they helped!

Thanks for reading! Merry Christmas!


Tuesday, December 13, 2011

Scrap Fabric Christmas Tree


Got a fun and easy one for you tonight. I saw this FABULOUS set of lights made by a talented girl on a blog and had to try her technique. Whiteney Caroline Desings did this but used ribbon, I am far too conservative with my ribbon (two beautiful girls with beautiful hair need all the hair bows this mama can crank out) so I used some scrap fabric. 


All you need is some scrap fabric or ribbon and some Christmas lights. I think you should use mini lights because they don't get as hot, and during the Christmas season fire is this Poor Badgers biggest fear. 


You basically just cut you some strips, the length and width is all determined on how you want it to look, I liked the shaggy look so I think I cut mine 7 inches long by 2 inches wide. After you cut your strips just tie a plain knot onto your lights. Easy as pie. 


By the by, the star that you saw was made by my oldest badger. She is turning out to be a super crafty gal and I wouldn't trade her not a gosh darn thing. Notice the hair bows on her head? That is where I got the fabric for this project, from some old yo-yo hair bow projects last year.  Poor badgers craft on a dime.


I used my strand of fabric lights to fashion myself a little tree to place in the house that could have used a little extra light. I used thumbtacks (we are planning to paint in the Spring anywho) to fashion the outline of the tree and my sissy cats star made the tree just poop.

Thanks for reading and I hope everyone is enjoys the blessings of our saviors birth as much as the Poor Badgers are. Merry Christmas! 


Friday, December 9, 2011

Meet our family elf; Alabaster Snowball!


Oh how my kids LOVE this new Christmas tradition called Elf on the shelf. I wanted to blog about this in time for you to adopt your own family Elf. Christmas is about celebrating the birth of our savior, but I really feel strongly about incorporating fun family traditions that foster imagination and family bonding.


First you need to go adopt your own Elf. These are pricey, around $30 a kit. But you only have to buy them once and thankfully we got ours on Black Friday with a 10% discount and a $5 off coupon. Book stores,  pharmacies, Target, and Hallmark stores carry them. They come in this cute box that you save each year to announce the coming of your family Elf!


Your kit comes with a story book you can read to your kids explaining the story of the scout elf. In a nut shell the second you first get your elf home you must name them, that is how they get their magic. Then read you kids the story and let the magic happen. 


Santa needs help figuring out what kids are good or bad, so these scout elves watch your family. Once an elf joins the family, they are bonded for life. Once the holidays begin the elf you had last year reappears at your home with his book and he/she begins taking note of the kids.


Every night once your kids go to sleep, your elf uses its magic to fly to the North Pole and tell Santa all the good things and bad things they did for the day. Then your elf zooms back home before morning and hides in silly places. It becomes a game to see who can find the elf first and see what silly thing your elf did. 


Only two elf laws; elves can only listen to you. They will take note of what you want for Christmas and relay the message to Santa, but they can not talk back. The second is VERY important; if you touch the elf it will lose its magic. No more flying to Santa. Proudly I can say that after a month, no Scaff kid has touched our Alabaster. 


Our Elf is Alabaster Snowball, he is a Southern Gentlemen with a pension for the ponies. He enjoys the formalities of a polite and proper phone conversation but also is frisky and likes to do some very wonky things.


One morning we awoke to this bit of cheekiness. We blocked the number. We think this was a bit of elf revenge. 


On Christmas Eve night, your elf leaves your family for the year. He joins Santa and his buddies but will return promptly once the Christmas season comes back around.


We love that our family has adopted this proper little trouble maker. Alabaster Snowball has made this month so fun and it will be sad when he leaves. There is a website that lets you share the stories and pics of your elf; elfontheshelf.com.


Thanks for reading! We hope you have enjoyed Alabaster as much as we do.